It is easy to guess that “standard” and “ordinary” wings do not exist in nature. They all differ in several ways.
1. By tire diameter and width
2. Places for mounting on a bicycle
3. Fenders for bicycles without fasteners on the frame
4. Full-size in terms of material of manufacture
5. Selection of wings according to the method of attachment
6. Exotic and homemade wing options
Selection of fenders according to tire diameter and width
First of all, fenders are selected according to the diameter of the wheel, which you can find out by looking at the side of the tire. After all, they are all so different - from 12 to 29 inches. Once you know it, you can safely go to the store and ask to see all the possible options for your wheel size.
However, the wings do not differ in diameter by the same diameter. Look at the width of the fender so that it can completely cover your tire. This is especially true for mountain bikes, where tires can be quite wide, and even more so for fat bikes.
Selection of fenders according to places for mounting on a bicycle
Once you've decided on the diameter and width, look at your frame and fork. Are there holes for attaching the wing? On the fork they should be on the gorilla (the bridge connecting the 2 parts of the fork) and at the bottom where the wheel is attached. There should also be holes on the frame (or “ears”) near the place where the wheel is attached to the frame, in the jumper connecting the upper frame stays, and also at the bottom on the jumper connecting the lower stays of the frame. 
If there are holes, then feel free to take a set of full wings - this will be the most practical option. The most that can get dirty is your shoes. Although this can be prevented by installing a mudguard (it can be included in the kit). There is no need to worry about the appearance of your bike, even if you have mountain bike. Not the coolest appearance a bike with wings is easily compensated by your neat appearance, regardless of the amount of water and dirt on your way.
Fenders for bicycles without fasteners on the frame
If you have a full-suspension mountain bike or a hardtail without frame mounts, then we have bad news for you. It will not be possible to completely protect against dirt and water due to the lack of necessary fasteners for installing full wings. But quick-detachable wings can protect you from total washing.
With such wings, clothes below the waist will still be dirty, but if you were going to meet a girl, you can hide behind a bush and give her flowers from there. After all, you will look impressively good from the waist up.
In general, of course, on mountain bikes, fenders are not the most practical accessory and rarely provide complete protection. This does not apply to city bikes, folding bikes, or cruisers. There, fenders are a necessary element, without which it is impossible to imagine such bicycles, because they are equipped with fenders as standard from the factory. True, you may not always be satisfied with the wings offered by the manufacturer. After all, even full-size wings have significant differences, primarily in material.
Differences between full-size wings by material of manufacture
Steel.
Perhaps the most impractical option. Their only advantage is that they are cheap. Everything else is a minus. Have heavy weight, significantly making the bike heavier. They are very unreliable when shaking - the corner mount tends to fall off the wing and often does this successfully. When driving, they create annoying noise, constantly rattle, and require frequent tightening of connections.
Aluminum. Lighter than metal ones, but they are very rare for the above reasons, and are much more expensive.
Plastic. Also quite a rare option. They are much lighter than metal ones, inexpensive, but also not very reliable.
Metal-plastic .
The most popular, reliable and lightweight. Thanks to the thin metal base and plastic surfaces, they have high strength, crack much less from many irregularities, and are quite elastic.
The remaining wings differ in the method of attachment
Quick-release . 
The front fender is attached to the fork stem from below. The plastic sleeve is inserted inside, and thanks to the spacer mechanism it is firmly fixed there. The rear fender is attached to the seatpost using a clamp made of high-strength fabric. Both wings can be removed in 5 seconds, which is why they got their definition.
Easy to mount. 
The front fender is attached with a screw to the gorilla fork. The rear one is attached either only to the jumper between the upper stays of the frame, or it can have an additional hook to the seat tube of the frame.
Exotic and homemade wing options
Such wings can only protect a small part of the body, but they have their place.
Frame shield will take on some of the dirt directed at you above the waist. 
Shield for fork will take away some of the dirt intended to get on your face, and also protect the working surface of the fork from severe wear. 
Spacer between the gorilla and the crown of the fork is also designed to protect the cleanliness of your face. 
Saddle shield will leave your butt dry and clean. 
Most of the exotic “wings” can be made with your own hands. Remember the program “Crazy Hands”, where 2 men collected from plastic bottles and Lada Priora packages? So, at a minimum, you can assemble wings with the protection you need from plastic bottles. If you only have quick-release fenders on your bike, you can supplement them with a homemade plastic fender. A sturdy folder from an office supply store may also be suitable for small shields. All you have to do is cut the required shape and install it on the bike using nylon ties. 
Great video about DIY wings.
Maintenance: DIY bike fenders
A bicycle is an environmentally friendly means of transport, and riding it is very popular. Owners of this equipment must have some maintenance and repair skills, because this will allow them to quickly and effectively find a way out in unforeseen situations, for example, sealing a camera or putting fenders on a bicycle. The latter option causes a lot of controversy among fans of two-wheeled transport. It all depends on individual preferences and it is worth familiarizing yourself with this topic in a little more detail.
For or against
Fenders for bicycles have both advantages and disadvantages, which are determined by the type of bicycle and its purpose. Among positive aspects This part on the wheels can be noted that:
- This is good protection against dirt and splashes from under the wheels;
- Properly selected, they do not spoil the appearance of the equipment;
- Some types are quickly attached and removed.
Fans sports bikes most often they do without wings, since they add to the weight of the bicycle, which is unacceptable for sports. For city riding, this detail can be very useful: it will protect the cyclist from dirt getting on his clothes. In order to understand whether the installation of this element is really necessary, you need to try everything from your own experience, and also select correct view fenders on wheels. They may be:
- Stationary short;
- Quick release short;
- Stationary long.
The first option is quite common and they are made of plastic. They need to be attached to the fork or frame using a bolt. The protection is not complete, which in some cases can be significant. Their weight is small and therefore they do not particularly affect the weight of the equipment.
Quick-release short ones are also made of plastic, but are mobile. They should be secured using a special clamp, which ensures quick installation and removal. Many cyclists use this type fenders on wheels despite the fact that the level of protection is not very high. It is important to carry out the installation correctly, otherwise the part will be useless.
Long stationary fenders for a bicycle are metal parts that are installed by fastening in three places to the fork and frame. The area of protection from dirt flying from the wheels is quite large, but it is necessary to periodically clean the part itself. They are most suitable for road or road bikes.
For mountain models, a special type of fender design should be chosen. Medium-sized options are well suited, providing the most effective protection and being easy to remove. Here, an acceptable option is to use only one wing per wheel - the rear one. You can tie a rubber strip on the front.
Installation

Mobile versions of this part are quite easy to install, but the process of attaching stationary ones requires especially close attention. Before starting work, you must disable the rim brakes, which will allow you to attach the rear fender without problems. Then the screw located under the seat is removed and you need to place the element on the seat post. The front fender is easily bolted to a location near the fork crown. It is important to calculate the force with which the bolts are tightened. If you tighten it too much, the fastener may be damaged and become unusable; otherwise, it will dangle freely and interfere with driving.
Most often, the option of installing one part is not chosen; it is more efficient to install a complete pair. This will provide better protection against splashes and dirt. If you plan to install a trunk, you must first install the rear wing. If the trunk is already installed, it must be removed.
Tools you will need:
- Nuts;
- Screws;
- Screwdrivers;
- Keys that fit.
Now the question of how to install fenders on a road or road bike has been resolved. Choosing the right option is easy, because modern manufacturers They produce a sufficient range of such devices. You can also make wings yourself, but this is a rather labor-intensive process. Proper installation will ensure the functionality of the part and will not make it useless and weigh down the bike.
Whether a bicycle needs wings or not is a matter for everyone to decide for themselves. For example, a bicycle without wings is not interesting to me. Washing all my clothes after every bike ride is not for me.
Most fenders produced for mountain bikes are purely decorative and do not protect against splashes or mud. Full-size fenders are needed for protection. These are the ones I purchased. Specifically Flinger SW-FE-115F/R 27.5″. Not because they are super duper, but simply chose the cheapest full-size fenders for 27.5-inch wheels that were sold at local stores. The width is 65mm, which barely covers the 2.25 stock tires on my bike, but more than covers the 2.0 tires.

In the store, the wings did not inspire confidence, but after the purchase I went to the SunnyWheel manufacturer’s website and found this picture:

I was interested in the last picture. Usually glossy wings like these break from a slight bend, but here someone bends the wing in half, and it doesn’t break. I took the risk of doing this with my wing. It bent just like in the picture and straightened out, and there weren’t even any traces left at the bend! So the quality of these wings is quite good.
Eat different types rack mountings. In the photo - metal ones. My wings are plastic. They allow you to slightly adjust the length of the strut within 2 cm and supposedly separate themselves in problematic cases (apparently, if something gets between the wheel and the fender or struts).

Attaching the wings to the frame.
Problems with fastening started from the very beginning. My frame doesn't have holes to mount full size fenders! The steel struts and their attachment to the wings are made so that the loop goes directly to the wheel axle. Apparently, the manufacturer assumed that the axle was threaded through the loops and tightened along with the wheel. But this cannot be done on my bike. Firstly, left and right side there are asymmetrical. The side with the rooster is flat, and there you can somehow install a loop, but the other side is figured, and an attempt to clamp the loop of the posts there leads to the fact that the posts do not stand vertically, but at an angle, moving away from the wing to the side. In addition, the loops of the struts are thick, and it is impossible to tighten the wheel with them; the nut simply does not tighten to the full length of the thread, which greatly affects safety. Another problem was that right in the place of these loops there are springs that center the tie, but these springs do not fit into the loops along the diameter, they simply get jammed there. Therefore, this mounting option had to be discarded. The racks could not reach the hole for attaching the trunk, since it is too far from the wheel axis, to which the racks should ideally go. There are no other holes there, and there are no holes on the fork at all, except for the one on the gorilla, so I had to get smart.
Abandoned furniture was found at a local landfill. There were aluminum corners screwed to chipboard panels. I unscrewed them, they are very light, their weight is practically not felt in the palm of your hand (much lighter than steel products). From one corner of the grinder I made four adapters, drilling two holes in each in the right places:

Important point. Although the wheel axle is smaller in diameter, a large hole was drilled so that the spring in it could move freely, otherwise when installing the wheel you get garbage. The shape of the adapter near the large hole should be such that on the side where the seat for the nut is not flat, the adapter can lie flat (parallel to the wheel) and not bulge to the side. A small hole is drilled to match the diameter of the bolt that is on hand for attaching the stand loop to the adapter. I sawed off the bolts to the minimum required size so as not to interfere with the movement of the chain and cassette, and used washers on both sides.
The bicycle in the photographs is turned upside down, as the photographs were taken while the fenders were being mounted.


Since the hinge is shifted from the center of the wheel by several centimeters, the racks will have to be cut a few centimeters, one more, the other less. I sawed so that there was 3.5 cm between the wheel and the wing. There is no point in doing more, since on the front side this is how much the frame limits the movement of the wing. Doing less is dangerous, as dirt stuck to the wheel can rub against the fender and make movement difficult. You can always saw off more and reduce the gap, but you won’t be able to increase the struts, so it’s better to start with a larger gap and, if necessary, reduce it later (if the wings don’t catch dirt).


The plastic fasteners are screwed to the wing using the supplied self-tapping screws, and the steel struts are tightened by hand with a plastic nut. The gap between the fender and the tire is sufficient.

But the rack mount is initially located quite close to the wheel (about 1 cm). On wide tires this can be a serious problem. So, Rapid Rob 2.25 fits almost right next to these plastic fasteners. On bumps they will probably scratch with protruding “cubes”. When mounting the front wing, I found a simple solution (read below), with 2.0 everything became normal, but for 2.25 I would still not recommend buying these wings, or you will have to make homemade strut mounts (more widely spaced with outside wing).

The rear wing, in addition to the double steel struts, has two more mounts. One is at the height of the trunk through the included plastic half-clamp. There is a hole on the frame in this place without a thread, so you need to select the bolt and nut for this fastening yourself. The other one is at the very bottom - the hole on the fender is aligned with the hole in the frame and is tightened with a bolt that is not included in the kit. The threads in the frame are already cut. There were no problems with the mount itself in these places, but the fender pinched the front derailleur, and it did not shift. I had to fiddle with it to move the fender away from the switch and closer to the wheel. In my case, a plastic spacer and several washers between the fender and the frame helped.


As for the front wing. The top mount attaches to a hole in the gorilla. To be honest, when buying a bicycle, I was looking for one that had this hole, since many forks now do not have such a hole, and there is another homemade mount that needs to be invented. But there are no holes for attaching the fender struts on my fork. The original idea was the same - to make adapters from the wheel axle. There is also a non-flat seat for the nut, so I had to fill it with additional washers of the appropriate thickness. To be honest, I don’t really like the fact that something is hung on the wheel axle. The main disadvantage of this type of fastening is that the wheel cannot be removed without twisting the nut and removing everything on it from the axle, and small centering springs can easily get lost, especially if the wheel is removed in the field. But on the rear wheel I don’t see any alternatives yet, and on the front wheel I will try to make clamps on the fork to free the axle from foreign inserts. Maybe clamps are less aesthetically pleasing, but at least more “correct” 😉 But so far I haven’t found beautiful plastic clamps, and I don’t want to make a tractor out of a bicycle by molding heavy steel water clamps onto it, so for now I’m riding with my aluminum adapters:

The problem of the proximity of the fender strut to the tire on the front wheel turned out to be more noticeable than on the rear. The front fender does not have a double strut, but a single one, so at the slightest vibration the fender began to “play” on the sides, and these plastic things hit the side teeth of the tire. Of course, there is no benefit to either one or the other. The only thing I came up with was to bend the stand in the place where it fits the plastic fastener as shown in the photo. After this, the distance between the tire and the stand increased, the wing was fixed more rigidly, and nothing caught on anything. It turned out to be quite practical, so I also bent the struts on the rear wheel, moving them as far away from the wheel as possible.

At first it seemed to me that the front fender was not low enough and could not protect my feet from dirt. In practice, no problems were noticed. When driving through puddles, your feet remain clean. As if by the will of fate, a few weeks later I found on a forest road a rubber bicycle mudguard (branded) rolled into the sand, which fit perfectly into my fender, but since I often have to wander in the forest, drag the bike through fallen trees, I decided not to install it yet, because it is during forest losism that you understand why the wing ends exactly where it ends. If it were a little lower, it would cling to everything.
For comparison, the fender width and tire width of the Schwalbe Hurricane Performance 2.0 are:

Well, to fully complete the review, a photo with wings. I cannot help but note that the thin steel struts still do not provide rigidity, and the wings are quite shaky. They haven't come into contact with the wheels yet, but it's still unpleasant. Ideally, you should strive to view the wings so that these struts are as short as possible, but, alas, this does not always work out. You can click on the photo to see a larger image.

Tests in the real world.
Of course, I didn’t go into the mud on purpose, but circumstances were such that I had to overcome several flooded areas, so I decided to take a photo for this article at the same time. I was quite pleased with the result. I came out of the sticky mud absolutely clean and didn’t even get my shoes dirty. But Schwalbe Hurricane Performance barely managed the task. According to my feeling, about 80% of the force expended on pedaling was wasted, that is, the wheels simply turned in place, barely maintaining movement. If it weren't for the wings, rear wheel It would definitely spit mud all over my back. It's amazing how I even got out of the creek shown in the fourth photo. The exit from it was viscous and very slippery, the wheels were strongly sucked in, and when rotating they turned in vain. If the swamp had been a couple of meters longer, we would have had to dismount straight into this mud. However, I won’t completely criticize Hurricane. Firstly, they are not mud tires, but road tires, and the fact that they can pull out of a quicksand slippery swamp with their few teeth located only on the sides is even a plus compared to a classic road tire, which is generally useless for such places. Secondly, last year I had similar problems in these places on the toothy Rapid Robs - they also slipped noticeably, only less. As for the wings, they justify themselves. The wings don't stop dirty wheels from spinning, but keep both the rider and the bike clean. The only thing I don't like about these particular wings is that the steel struts are not stiff enough. Because of them, the front wing seems to vibrate from side to side on uneven surfaces, sometimes creating strange sounds such as rattling.


Application. Fastening the front fender with clamps.
There is such a method, attach clamps to the fork, and then attach the wing struts to them. The diameter of my fork is 39 mm, they fit perfectly with 1 1/4″ (38-44 mm) plumbing clamps, with rubber gaskets and a welded nut on one side. A bolt can be screwed into the nut and threaded through the wing strut loop. They sell them inexpensively (32 rubles per piece) in some Leroy Merlin stores (which ones - see their website). The disadvantages are the unaesthetic “tractor” look and the awesome weight, but if there is nothing better, you can live with it. They also sell lighter and nicer stainless steel clamps, 60 rubles per pair, diameter 30-45 mm, but you still have to figure out the mounting for the wing strut yourself. In general, you can play with them at your leisure, maybe something will work out. Theoretically, somewhere they should sell neat plastic clamps for just these purposes, but I couldn’t find them anywhere, and if they do exist somewhere, the price for them may turn out to be bleak.

The wings are still on the bike. I didn’t install the clamps, I left them as originally assembled. Overall, I'm happy with the wings, but I want to point out one feature. Pine cones. If you drive along a road covered with cones, they are somehow pulled between the wheel and the fender, and the same protection that I wrote about at the beginning of the article is triggered. The wing is disconnected from the struts using a plastic connector. According to the manufacturer's idea, this connector is disconnected and then snapped back by hand, and in reality this is usually the case, but, unfortunately, over the course of the season I have already broken two of these connectors with the help of pine cones - the thin tendrils of the clamp break off and they simply stop being fixed. The wing begins to fly out of the retainer on every bump, rattles and interferes with movement, so on a long journey this situation is very annoying. Of course, upon returning home, I simply filled all these connectors with superglue and they no longer come apart, but those who are not familiar with this problem should keep this in mind. After gluing all the quick-release fasteners with superglue, I no longer had problems with lumps.
On a bicycle implies the presence and, of course, is simply necessary reliable and high quality wings. As we wrote earlier, in wet weather having wings is much more important than having good clothes. After all, most of the dirt will fly at you from under the wheels of the bicycle.
In order to isolate yourself from this dirt, you need to install bike fenders.
A rational question arises - how to install fenders on a bicycle? Do it's very simple, but I was surprised to find that it's not just newbies who get a little lost when they need to solve this problem. Even people with decent riding experience do not always understand how to attach fenders to a modern bicycle.
You should start by choosing the right fenders for your bike. What kind of “correct” wings should you choose and how to do it?
For choosing bicycle fenders Several factors need to be taken into account: weight of the wings, reliability of fastening to the bike, your riding style and degree of protection. Full-size wings have the maximum degree of protection, but these wings are not at all suitable for riding in extreme and near-extreme styles.
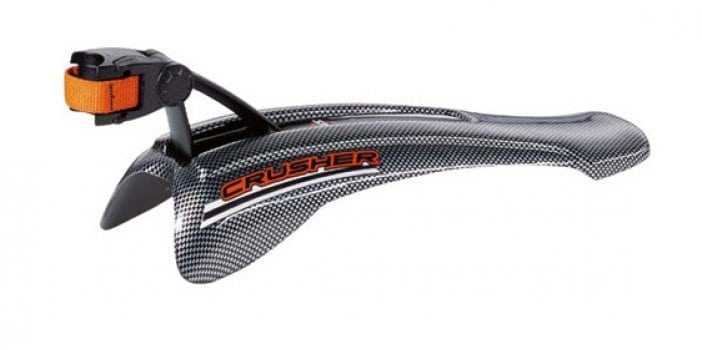
For aggressive disciplines, quick-release wings such as legendarycrusher. Such wings do not provide sufficient protection from dirt, but they can filter out most of it.
There are also intermediate options Bicycle quick-release fenders that are suitable for cross-country riding and simple city riding.

Contrary to popular belief, quick-release fenders also can provide good protection. If you want to get the highest possible degree of protection from removable fenders, you need to choose fenders from reputable manufacturers and select a size that matches your wheel size. Also, remember - wings larger size You can use it on wheels of a smaller diameter, but vice versa it won’t work very well. Also, when choosing wings, you need to consider their width. It should be sufficient so that the flow of dirt is completely absorbed by the shield.
Now about the weight of the wings and their reliability. The reliability of the fenders is determined by the quality of the fender's attachment to the bicycle and the quality of the material from which the fender is made. There is a market more budget wings, which are made of brittle and brittle plastic. This is not a reliable and even dangerous option. A good option are more plastic materials, for example as in wings sksblade.

As always in cycling world, the higher the reliability and lower the weight, the higher the cost. Wings have completely different weights, which is why you need to carefully study this issue when choosing.
Wings are installed on modern bicycle in different ways . The most common methods today are:

If there is no fastening there are several tricks that will allow you to install fenders on almost any bike. First appointment- this is the use of an anchor to attach the wing to the fork stem, instead of a rubber plug. This fastening option is much more reliable than cork. The anchor will hold up the much heavier wing. Installing the anchor is very simple - remove front wheel, turn the bike over and drive a regular anchor into the fork tube. Moreover, I recommend using this option is always when you come across a rubber plug or other fastener in the fork stem. There is one problem here - sometimes the fork rod at the bottom is different from the inner diameter of the fork rod at the top. In this case, the anchor will not help and you will have to use the standard option.
Second appointment- This is a wing fastening using metal clamps. Such a clamp allows you to fix both the central point of the fender (for example, on a gorilla fork) and the arc of the mounts. When using metal clamps, you need to think about the safety of the coating of the bicycle or fork.

A shrinking clamp will damage the coating, which is why you need to provide some kind of spacers or protective stickers.
Using these tips you can install fenders on almost any bike.
Now let's summarize a little and as a conclusion Let's note the general important rules that will allow you to achieve good result when installing the wings.
- Always remember the reliability of the design. Under no circumstances should the wing fall off when moving! At best, this is a loss of wing.
- The wing should not interfere with movement, steering or cling to your legs when turning. Also, the wing should not interfere with the operation of the suspension. It is enough to carefully study the position of the wing.
- The wing must be placed as close to the wheel as possible, but do not forget point 1.
- The wing should be no narrower than the tire.
Follow these rules and you will Easily install fenders on any bike, and trips in the worst weather will bring only joy!
Modern bicycle manufacturers do not consider it necessary to equip each bicycle with a full set of accessories. But without them, rides will be accompanied by low speed. We are talking about the trunk, mirrors, fenders. It is with the installation of the last element that problems often arise, especially for novice cyclists. Today we will learn how to install fenders on a bicycle, look at the various options and make you a professional in this field.
Bicycle fenders almost always come with instructions for installing them, as well as inserts. An exception may be Chinese models. Some instructions even have a diagram that makes the work much easier. But questions still arise and they require immediate clarification.
Installation principles
Installing fenders on a bicycle is, in principle, simple. Even a novice cyclist with a minimal set of tools can easily cope with this. It will be a little more difficult to find a high-quality model and decide on the type of installation that will suit a specific situation. The entire variety of wings can be divided into two large groups: stationary and quick-release.
Installation of stationary wings
Accessories of this type are installed using screws to the rear stays and front fork. Owners of city bikes can choose larger models with which half of the wheel is covered. Such accessories usually contain high-quality metal, and long “mustaches” made of wire are responsible for their fixation. They cling to the tips on the wheel axles.
During installation, you need to pay attention to the height of the wing. If it is located close to the wheel, then splash protection will be more effective. But in this case, you cannot hope for high cross-country ability, which will be felt well when moving along difficult routes. Dirt will accumulate under the wings and will have to be removed periodically.

Some installation features
If protective elements need to be installed on a bicycle with rim brakes, then you will need to loosen them a little or, in general, turn them off and only then proceed with installation.
In some cases, a reflector or corner reflector may be located at the location where the fixed wing is attached. There is nothing terrible or irreparable in this situation; moreover, the length of the bolt is sufficient for both of these elements to be secured.
Installing the front fender most often comes down to mounting at only one point. Designs that are equipped with so-called whiskers are not affected by this. For a fender on the rear wheel, there are usually two fastenings: the element is attached to the frame with a bolt, and it is attached to the lower part of the seat tube with its lower part. Some manufacturers equip their products with special arc-shaped latches.
If the bicycle has a trunk, the installation of the wing is carried out under it, if this allows, the wing and the trunk itself.

You can eliminate vibration on the fender and prevent displacement during intense rides using rubber bands, ties and other elements that will allow you to pull the fender to the trunk structure.
Installation diagram
In most cases, the installation of protective elements is carried out according to a general scheme, which looks like this:
- We unwrap the package with upgrade elements and a set of necessary fasteners.
- We fix the rods on the protective elements.
- Let's collect them.
- When working with the front element, you need to unscrew the white reflector and secure the first fastener under its bolt. Two clamps will have to be mounted on separate bolts with large washers.
- When working with the rear wing, you need to bend the plate and secure it in four places. Fastening the two clamps is carried out in the same way as described in the previous paragraph. The third fastening will require a six bolt. It must be strung on a tube and a plate. The last fastening is located at the bottom of the pipe on which the seat is attached.
- Installed fenders may require adjustment. Its purpose is to adjust the clamps and fastenings so that there is no friction between the wing and the wheel.
- Now you can tighten the bolts to the maximum level.
Installation of fenders depending on the type of bike
Not all bicycles have fenders installed according to the same principle.

Mountain bikes
Installation of quick-release protective elements is carried out not directly to the bike, but to its mounts. Due to this feature, the accessory will not be easy to steal, since the wing itself can be easily removed, and it takes time and effort to release the fastening.
The fastener or fender brace intended for the front fender must be inserted from below into the head tube structure. Then you need to tighten the fastener/spacer well using the adjusting screw. All that remains is to insert the wing into the groove, which will be indicated by a characteristic click.
Installation of the quick-release type rear guard is centered on the pin that holds the saddle. Some bicycles have a pin that is so smooth that an installed and well-tightened fender will move while riding. To eliminate this situation, it is necessary to use a rubber gasket, which will increase the friction force and will not allow the wing to live its own life. Some wings are not rigid enough, which causes them to jerk. In this case, it is necessary to choose wider specimens. Quick-release type fenders can be easily adjusted regarding the angle of inclination and proximity to the wheel.
In fact, installing wheel protection is not a very difficult job that requires turning to professionals. You can cope with such a task at home, the main thing is not to be afraid of work and have enough desire.


